How to Wax a Surfboard: The Ultimate Guide for Perfect Grip
Learning how to wax a surfboard properly is crucial for maintaining grip and control in the water. This ultimate surfboard wax guide covers everything from choosing the right wax to expert wax application tips, ensuring you stay connected to your board through every turn and drop. Master this fundamental skill to elevate your surfing experience.
Surfboard Life · August 16, 2026 · 12 min read
How to Wax a Surfboard: The Ultimate Guide for Perfect Grip
Learning how to wax a surfboard is a fundamental skill for any surfer, ensuring optimal grip and control in the water. Proper wax application creates the essential traction layer that keeps your feet firmly planted, preventing slips and enhancing performance. This comprehensive surfboard wax guide will walk you through every step, from selecting the right wax to advanced wax application tips, guaranteeing perfect grip every time you hit the waves.
For surfers, the connection between their feet and the board is paramount. A well-waxed board provides the necessary friction, allowing you to execute maneuvers, maintain balance, and feel confident even in challenging conditions. Neglecting this crucial step can lead to frustrating slips, missed waves, and even injuries. Whether you're riding a shortboard, longboard, or a funboard, understanding the nuances of wax application is key to unlocking your full potential. This guide will ensure your board is always ready for peak performance.
Why Proper Surfboard Waxing is Non-Negotiable
Beyond simply preventing slips, the way you wax your board significantly impacts your surfing experience. A perfectly waxed deck offers consistent traction, allowing for subtle shifts in weight and foot placement that are critical for advanced maneuvers. Imagine carving a perfect turn or landing an aerial – without that reliable grip, it's virtually impossible. Pro surfers often credit their meticulous approach to board preparation, including waxing, as a cornerstone of their performance. "A well-waxed board is an extension of your body," says an experienced shaper, "it gives you the confidence to push boundaries."
Proper waxing also protects your board. While not its primary function, a layer of wax can offer a minimal barrier against UV rays and minor abrasions, though it's no substitute for proper board care and storage. More importantly, consistent waxing habits mean you're regularly inspecting your board's deck, allowing you to spot potential issues like small dings or pressure dents early on. For more on board maintenance, check out our Repair Center.
Choosing the Right Surfboard Wax Types
The world of surfboard wax can seem daunting with its various options, but understanding surfboard wax types is simpler than you think. The primary factor is water temperature, which dictates the wax's hardness and stickiness. Using the wrong wax can result in it melting off in warm water or being too hard and slippery in cold water.
Here’s a breakdown of the main types:
- Basecoat Wax: This is a harder, non-temperature-specific wax applied directly to a clean board. Its purpose is to create a textured, bumpy foundation that the softer topcoat can adhere to and build upon. Think of it as the primer for your grip.
- Cold Water Wax (58°F / 14°C and below): This wax is the softest and stickiest. It provides excellent grip in icy conditions where harder waxes would offer no traction. Brands like Matunas and Mrs. Palmers are popular choices for cold water.
- Cool Water Wax (58-68°F / 14-20°C): A bit firmer than cold water wax, but still very pliable. Ideal for temperate climates and cooler mornings.
- Warm Water Wax (68-75°F / 20-24°C): Harder and less sticky than cool water wax, designed to withstand warmer temperatures without melting too quickly.
- Tropical Water Wax (75°F / 24°C and above): The hardest type of wax, formulated to resist melting in extreme heat. While it provides less initial stickiness than softer waxes, the basecoat ensures good traction. Using a softer wax in tropical waters is a common mistake, leading to a greasy mess.
Pro Tip: Always check the water temperature at your local break before a session. Many surf forecasting sites like Surfline provide current water temps, helping you choose the perfect wax for the day.
Eco-Friendly Wax Options
As environmental awareness grows, so does the demand for sustainable surfing products. Many brands now offer eco-friendly waxes made from natural, biodegradable ingredients like beeswax, soy, or tree resins, avoiding petrochemicals. These options perform comparably to traditional waxes and are a great choice for reducing your environmental footprint. Brands like Agenda, Famous, and Future Surf have excellent eco-friendly lines. When considering the best surfboard wax types, don't overlook these sustainable alternatives.
Step-by-Step Guide: How to Wax a Surfboard Like a Pro
Mastering how to wax a surfboard involves a few key steps. Follow this process for optimal grip and longevity.
Step 1: Remove Old Wax (The Foundation of a Good Wax Job)
Before applying new wax, it's crucial to remove any old, discolored, or dirty wax. This ensures your new wax adheres properly and provides maximum grip. "A fresh canvas always takes the paint better," explains a seasoned surf shop owner.
- Warm the Wax: Place your board in the sun for 5-10 minutes (or use a hairdryer on a low setting). This softens the old wax, making it easier to scrape off. Be careful not to overheat fiberglass boards, as this can delaminate the resin or damage fin boxes. For boards with traction pads, gently warm the area around the pad but avoid direct heat on the pad itself.
- Scrape It Off: Use a plastic wax comb or scraper (never metal!) to gently push off the softened wax. Work in long, even strokes, moving from the nose to the tail. Most wax combs have a flat edge for scraping and a serrated edge for creating texture later.
- Clean Residue: After scraping, you'll still have a thin, sticky residue. For a thorough cleaning, you can use:
- Specialty Wax Remover: These are often citrus-based and effective. Always test a small, inconspicuous area first.
- Mineral Spirits/Acetone: Use sparingly on a cloth. These are highly effective but can be harsh. Ensure good ventilation.
- Flour or Sand: Sprinkle a fine layer of flour or sand over the sticky residue, rub it with a cloth, and then wipe it clean. The flour/sand absorbs the stickiness.
- Vinegar: A more natural alternative, effective for lighter residues.
Once clean, wipe the board thoroughly with a damp cloth to remove any cleaner residue, and let it dry completely. A clean board is essential for a lasting wax job. For more insights on board maintenance, our Surfboard Anatomy guide provides details on different board components.
Step 2: Apply the Basecoat Wax
The basecoat is the foundation of your grip. It creates small, firm bumps that your topcoat will adhere to, preventing the softer topcoat from smearing.
- Choose a Basecoat: Use a dedicated basecoat wax or a harder, colder temperature wax if a specific basecoat isn't available.
- Application Pattern: Apply the basecoat in a systematic pattern over the areas where your feet will be. Common patterns include:
- Circular Motions: Small, overlapping circles, about 1-2 inches in diameter.
- Crosshatch Pattern: Diagonal lines going one way, then diagonal lines crossing them in the opposite direction.
- Straight Lines: Long, even strokes from rail to rail or nose to tail.
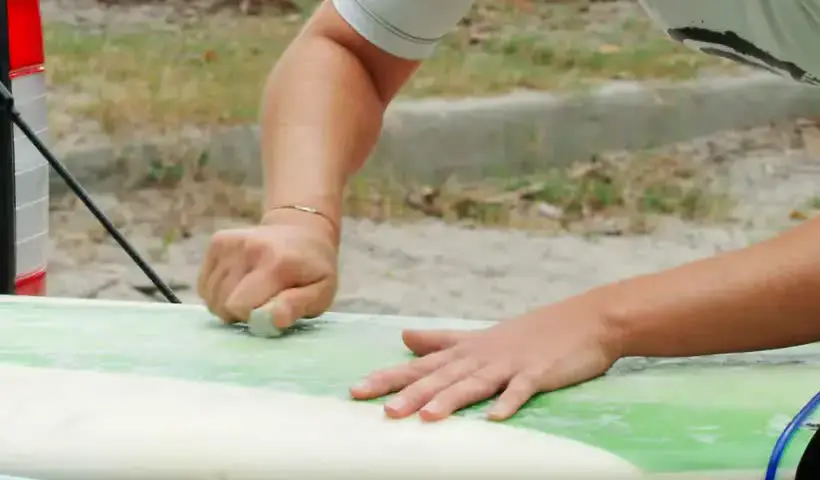
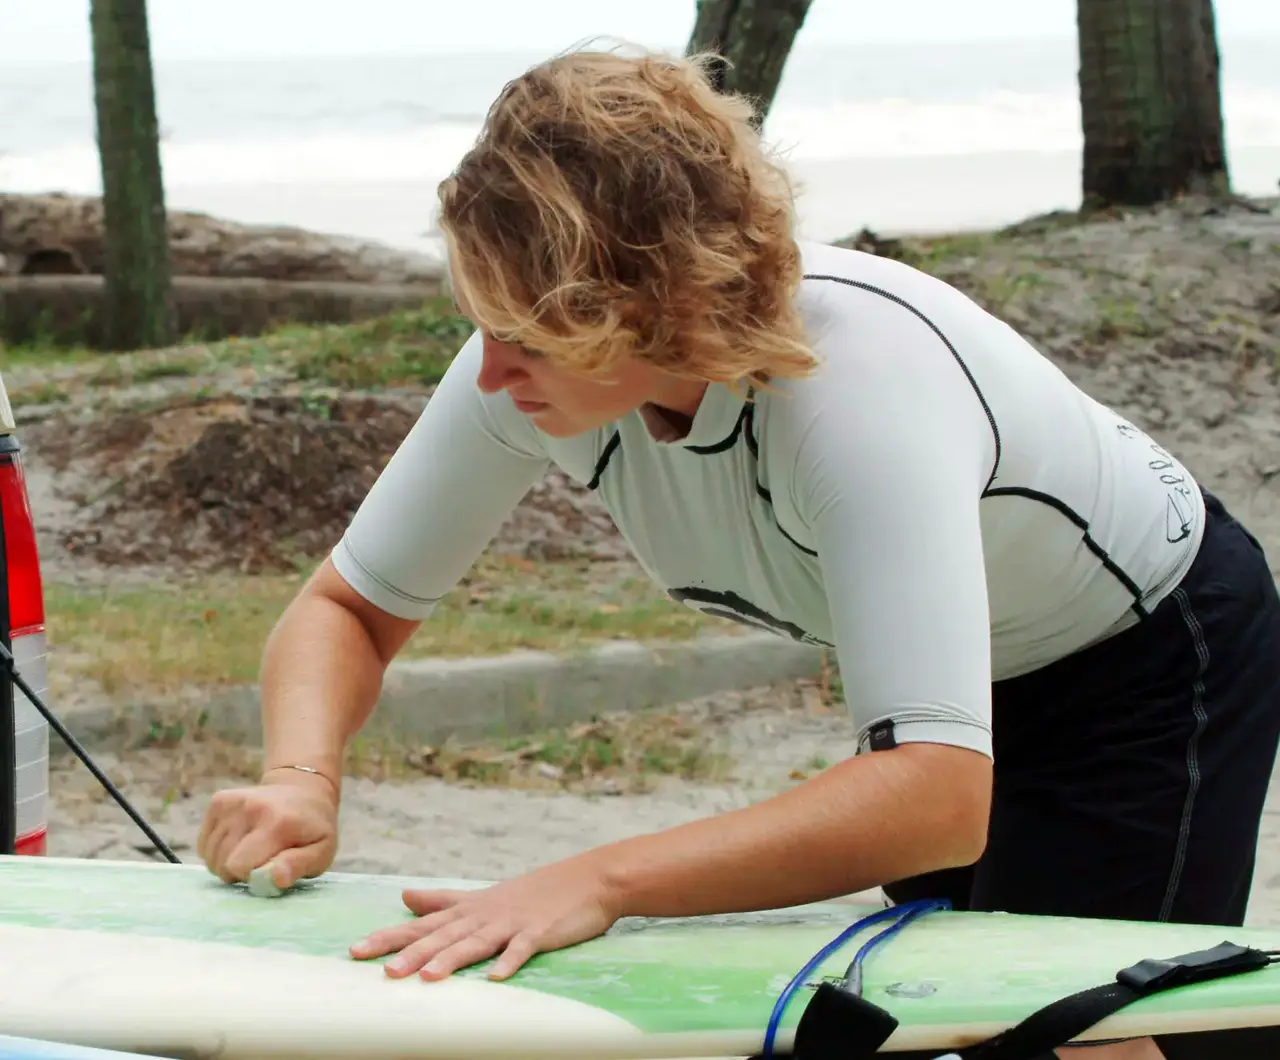
The goal is to create a uniform layer of small, firm bumps. Apply light to medium pressure. You'll start to see tiny beads or bumps form. This process usually takes 5-10 minutes, depending on the board's size. For a shortboard, focus from the tail pad up to the middle of the board. For longboards, cover the entire standing area, often from the tail to about 2-3 feet from the nose for cross-stepping.
Step 3: Apply the Topcoat Wax
Once your basecoat is established, it's time for the softer, grippier topcoat, chosen specifically for the water temperature.
- Select Your Wax: Choose the appropriate wax type based on the water temperature you'll be surfing in (e.g., tropical, warm, cool, cold).
- Application Pattern: Similar to the basecoat, use circular, crosshatch, or straight-line motions. The key difference is that the topcoat will grab onto the basecoat bumps, creating more pronounced, stickier texture.
- Focus on Key Areas: Concentrate the topcoat where your front and back feet will primarily be. For a shortboard, this is usually from the tail pad area up to about two-thirds of the way up the board. For a longboard, cover the entire area you plan to stand on, often extending further towards the nose for nose riding. Avoid waxing the rails or the bottom of the board, as this can affect performance.
- Build It Up: Continue applying until you have a good, visible layer of sticky bumps. Don't press too hard; let the wax do the work. The goal is traction, not a thick, flat layer.
Pro Tip: If your board has a traction pad, apply wax only around it, covering the remaining areas where your back foot might shift. The pad itself is designed to offer grip without wax.
Advanced Wax Application Tips for Enhanced Performance
Beyond the basics of how to wax a surfboard, these wax application tips can help you achieve an even better, longer-lasting grip.
- The Power of the Wax Comb: After applying your topcoat, lightly comb the wax with the serrated edge of your wax comb. This creates fresh texture, enhancing grip. Do this before each surf session or whenever your wax feels slick. This is a quick and effective way to refresh your grip without a full re-wax. A good comb can extend the life of your wax job by several sessions.
- Layering for Longevity: For longer surf trips or if you anticipate varying water temperatures, consider applying two different topcoats. For instance, a thin layer of cool water wax over your basecoat, followed by a lighter layer of warm water wax if you expect the day to heat up. This provides versatility.
- Waxing in Cold Climates Without Sun: If you're in a cold climate with no sun, use a hairdryer on a very low setting to gently warm the board's deck just enough for the wax to adhere. Alternatively, a warm car interior can also work. The key is gentle warming to avoid damaging the board. Focus on cool and cold water wax types, which are softer and easier to apply in lower temperatures.
- How Often to Re-wax? This depends on how frequently you surf and the water temperature. As a general rule, a full re-wax (including removal of old wax) is recommended every 1-3 months or after about 10-15 sessions. For light users, twice a year might suffice. However, refreshing the topcoat and combing before each session is ideal. If your wax looks dirty, discolored, or flat, it's time for a clean slate.
Pro Tip: For optimal performance, some pro surfers will even apply a fresh, light topcoat just before each session, especially on their shortboards, ensuring maximum stickiness.
Surfboard Wax Troubleshooting and Common Pitfalls
Even with the best intentions, things can go wrong. Here’s some wax troubleshooting to keep your grip solid.
- Wax Not Sticking: This is almost always due to an unclean board or incorrect wax type. Ensure all old wax residue is removed before applying basecoat. Also, make sure your basecoat is firm and properly applied before the topcoat. If the water is too cold for your wax, it won't adhere. If your board has just been repaired, make sure the resin is fully cured and clean before waxing.
- Wax Melting Off: You're likely using a wax that's too soft for the water temperature. Switch to a harder wax (e.g., tropical or warm water). Store your board in the shade or a board bag when not in use to prevent excessive melting. Never leave your board exposed to direct sun for long periods, especially in a car, as this can also damage the board itself.
- Greasy, Flat Wax: This happens when you apply too much wax, press too hard, or use wax that's too soft without a proper basecoat. The wax flattens out, losing its bumpy texture. The solution is to remove it and start fresh, focusing on creating distinct bumps with your basecoat.
- Dings Before Waxing: It's crucial to repair any dings before waxing. Wax can get into cracks and make future repairs harder. For advice on DIY repairs, visit our Repair Center.
Beyond Wax: Traction Pads and Board Setup
While this guide focuses on how to wax a surfboard, it's worth noting that many surfers, especially shortboarders, use a tail traction pad in conjunction with wax. These pads offer superior, consistent grip for the back foot and eliminate the need for wax in that specific area. When using a pad, you'll only wax the deck forward of the pad. Consider your board type and personal preference – our Board Types Guide can help you decide.
For those looking for a new board, our Board Finder Quiz can help match you with the perfect ride, taking into account factors like volume, skill level, and wave type. Understanding surfboard volume and its impact on performance is also key; explore our Volume Calculator for more. And don't forget the importance of fin setup, detailed in our Fin Systems Guide, which works in harmony with your grip to control the board.
Storing Your Surfboard for Wax Longevity
Proper storage is essential for maintaining your wax job and prolonging the life of your board. Avoid leaving your board in direct sunlight or in a hot car, as this will melt your wax and potentially damage the board itself. Store it in a cool, shaded place, preferably in a board bag. If transporting, a board bag also protects against dings and dirt, keeping your wax cleaner for longer. For more tips on caring for your board, consider consulting our the board finder for personalized advice.
This meticulous approach to waxing is a hallmark of dedicated surfers. As one of the earliest surfing legends, Duke Kahanamoku, emphasized the importance of being prepared for the ocean, a perfectly waxed board embodies that readiness.
Conclusion: Master Your Grip, Master Your Ride
Understanding how to wax a surfboard is more than just an chore; it's a fundamental aspect of connecting with your board and the waves. By consistently applying these wax application tips and choosing the right surfboard wax types, you'll ensure optimal grip, control, and confidence in the water. Remember to always start with a clean slate, apply a solid basecoat, and then tailor your topcoat to the water temperature. Don't let slippery feet hold you back; embrace the ritual of waxing and elevate every session.
Ready to put your newly acquired waxing knowledge to the test? Grab your board, choose your wax, and hit the waves with confidence! For more surfing essentials, continue exploring Surfboard Life – your ultimate resource for all things surf.
Frequently Asked Questions (FAQs)
Q1: How often should I completely re-wax my surfboard? A full re-wax, including removing old wax, is recommended every 1 to 3 months or after 10-15 surf sessions. This ensures the best grip by eliminating dirty, flat, or discolored wax layers and allowing for a fresh basecoat application.
Q2: Can I use different brands of wax together? Yes, generally different brands of wax can be used together, especially if you're using one for a basecoat and another for a topcoat. The key is to match the topcoat wax to the water temperature for optimal performance.
Q3: What if I accidentally wax the bottom of my board? Wax on the bottom of your board will create drag and negatively affect performance. It's crucial to remove it immediately. Use a wax comb or scraper to gently scrape it off, then clean any residue with a wax remover or mineral spirits.
Q4: Is there a difference in waxing technique for a longboard vs. a shortboard? The fundamental technique for how to wax a surfboard (basecoat, topcoat, temperature-specific wax) is the same. However, the area covered differs. Longboarders typically wax a larger surface area, often extending further towards the nose for nose riding, while shortboarders focus on the main standing areas from the tail pad forward.
Q5: What's the best way to store my wax so it doesn't melt? Store your unused surf wax in a cool, dry place, ideally in its original packaging or a small container. Avoid leaving it in direct sunlight, a hot car, or next to heat sources, as this will cause it to melt and become less effective.