How to Wax a Surfboard Properly: Complete Pro Guide
Learn how to wax a surfboard properly using proven basecoat and topcoat layering techniques. Discover temperature charts, board-specific zones, and pro troubleshooting.
Surfboard Life · November 3, 2026 · 14 min read
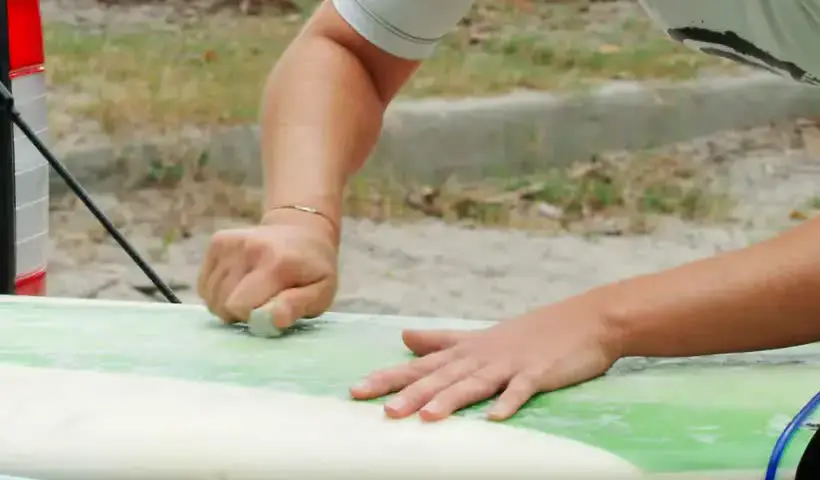
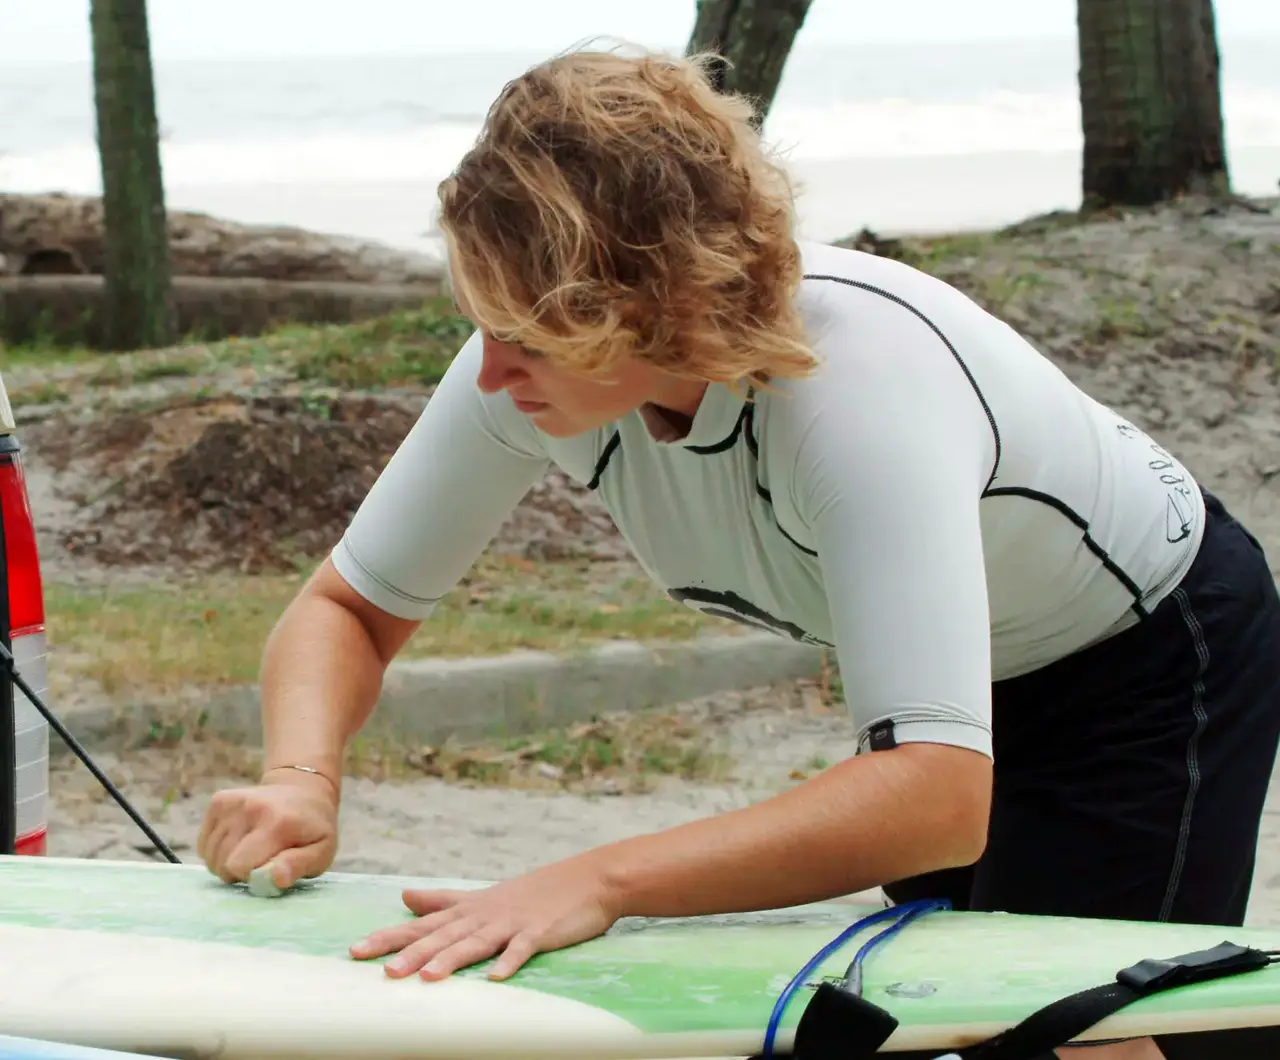
To learn how to wax a surfboard properly, start with a completely clean, stripped deck. Apply a hard basecoat wax using firm, crosshatch diagonal strokes to form a grid of raised micro-bumps. Next, lightly apply a temperature-appropriate topcoat in broad circular motions over the bumps to create sticky, grippy traction crowns without smearing the underlying base.
Every surfer has experienced that split-second horror: you stroke into a heavy, pitching peak, pop up toward the flats, and your front foot slips as if you stepped on wet ice. Poor deck traction turns great sessions into missed opportunities. Wax is your only physical connection to the deck laminate, acting as the interface that translates foot pressure into driving rail turns and balanced maneuvers.
Waxing might seem like a simple ritual, but doing it correctly is a science of polymer hardness, surface texture, and thermodynamic friction. In this guide, we break down everything you need to know about preparing your deck, selecting the correct chemical formulations, mastering application geometry, and troubleshooting stubborn wax problems for any condition.
The Crucial Difference: Surfboard Basecoat and Topcoat
A common mistake beginner surfers make when learning how to learn to surf is grabbing a single bar of soft wax and rubbing it randomly across a bare deck. Doing this causes the wax to flatten out into a greasy, slippery smear within twenty minutes of paddling out. To achieve durable, long-lasting grip, you must understand the two-layer system: surfboard basecoat and topcoat.
+-------------------------------------------------------------+
| TOPCOAT: Soft, tacky, temperature-reactive wax "crowns"   |
| BASECOAT: Hard, high-melt-point bead foundation             |
| FIBERGLASS / RESIN DECK: Clean, oil-free surfboard surface  |
+-------------------------------------------------------------+
Why You Need a Dedicated Basecoat
Basecoat wax is engineered with a high melting temperature (typically 140°F to 160°F / 60°C to 71°C) and higher paraffin/microcrystalline density. It is extremely hard to the touch. The purpose of basecoat is not to provide foot tackiness, but to establish a rigid mechanical profile—a dense field of hard micro-beads anchored directly to the fiberglass resin. Without a basecoat, soft topcoat wax collapses under the weight of your feet and rubs off against your wetsuit during paddling.
How the Topcoat Works
Topcoat wax is softer, stickier, and enriched with tackifying resins (such as tree rosin or synthetic tackifiers). When layered lightly over the hard basecoat beads, it forms pliable, sticky "crowns" on top of the nodules. These crowns provide instantaneous friction against your feet or booties without compromising the structural shape of the bump underneath.
Pro Tip: Never use your warm-water topcoat as a basecoat in cold climates. Always buy dedicated, extra-hard basecoat wax. A properly laid basecoat can last an entire season, requiring you only to freshen up the topcoat between sessions.
How to Remove Old Surf Wax Safely
Before you can apply a fresh set of bumps, you must know how to remove old surf wax without gouging your board's fiberglass, damaging delicate EPS foam cores, or delaminating the deck skin. Layering new wax over dirty, yellowing, or flattened wax traps sand and deadens your board's natural responsiveness.
OLD, DIRTY DECK                  SOFTEN WAX                      CLEAN RESIN
[===x=x=x===]  -->  Sunlight (5-10 min) or  -->  [===========]
(trapped sand)      Warm Water / Wax Comb        (pristine surface)
Step-by-Step Deck Stripping
- Soften the Wax Naturally: Place your surfboard in direct sunlight for 5 to 10 minutes until the wax turns glossy and soft. If you are dealing with an epoxy board (which is sensitive to heat expansion) or it is an overcast day, pour warm (not boiling) tap water over the deck, or use an electric hairdryer on its lowest heat setting kept at least 12 inches away from the fiberglass.
- Scrape with the Correct Edge: Take a plastic wax comb scraper edge (never use metal putty knives or kitchen utensils). Hold the scraper at a 45-degree angle and scrape in long, continuous strides from rail to rail or nose to tail. Push the softened wax into loose balls and discard them.
- Dissolve the Chemical Residue: After scraping, an oily film remains. Spray the deck with a citrus-based wax remover or rub the deck down with a specialized wax-removing sponge or flour. Flour binds to residual oils, turning them into dry, rub-off beads.
- Inspect the Bare Glass: Wipe the surface clean with a lint-free microfiber towel. This is the ideal moment to inspect your deck for stress cracks or pressure dings that may need attention at a Repair Center before water intrusion occurs.
Pro Tip: When cleaning soft-top foamies, skip heat entirely. Heat causes the foam deck to bubble and delaminate from the internal core. Instead, use a plastic comb very gently at room temperature, followed by a light rub with mineral oil on a cloth.
Best Surf Wax for Water Temperature
Choosing the best surf wax for water temperature is the single most critical variable in determining whether your deck feels sticky or slick. Wax manufacturers formulate their products by balancing soft, low-melting-point oils with hard paraffin waxes. If your wax is too hard for the water, it becomes slick like smooth plastic. If it is too soft, it melts off into white goop, leaving bald patches on your deck.
For verified wave reports and localized sea surface temperatures before waxing up, consult tools like Surfline to dial in your target range.
Water Temperature Selection Chart
| Wax Classification | Water Temp (°F) | Water Temp (°C) | Hardness Rating | Topcoat Role / Characteristics | | :--- | :--- | :--- | :--- | :--- | | Basecoat | All Temperatures | All Temperatures | Extreme Hard | Foundation bumps; never used alone as topcoat | | Cold | Sub 58°F | Below 14°C | Extra Soft | Ultra-tacky; prevents hardening in freezing water | | Cool | 58°F – 68°F | 14°C – 20°C | Soft / Medium | Balanced tack for temperate climates and spring suits | | Warm | 64°F – 74°F | 18°C – 23°C | Medium / Firm | Resists softening under warm sun; holds bump shape | | Tropic | 75°F and above | 24°C and above | Hard | Resists melting in high water and equatorial air temps |
Surfers frequently encounter conditions that bridge two categories—such as 66°F (19°C) water under an 85°F (29°C) sun. In these overlapping scenarios, always select your topcoat based on the water temperature rather than air temperature, but keep your board sheltered in the shade until the moment you paddle out.
Reputable wax manufacturers like Sticky Bumps, Sex Wax, and Fu Wax often feature slightly different proprietary temperature brackets. When competing on the World Surf League Championship Tour, athletes frequently rub an ultra-sticky, cold-water formulation (like Fu Wax or Sticky Bumps Day-Glo) solely under their front foot arches right before their heat for instant, maximum grip.
How to Wax a Surfboard Properly: Step-by-Step Technique
Learning how to wax a surfboard properly requires patience, light hands, and clean technique. Rushing the process by pushing too hard ruins the bump formation. Here is the exact routine used by experienced shapers and tour pros.
STEP 1: BASE GRID            STEP 2: CROSSHATCH           STEP 3: CIRCULAR TOPCOAT
 /  /  /  /  /  /             \  \  \  \  \  \              (o) (o) (o) (o)
/  /  /  /  /  /     +        /  /  /  /  /  /     =       (o) (o) (o) (o)
(Diagonal Lines)             (Diamond Crosshatch)          (Tacky 3D Bump Nodules)
Step 1: Prep Your Workspace
Place your surfboard on a secure, padded stand or a soft grass lawn in a shaded, breeze-cooled area. Direct sunlight will cause the wax to melt upon contact with the fiberglass deck. Ensure your hands are clean and free from sunblock, which degrades wax chemistry on contact.
Step 2: Lay Down the Crosshatch Base Grid
Take your hard basecoat bar. Using the edge of the block rather than the flat face, draw light diagonal lines across the deck from rail to rail at a 45-degree angle, spaced roughly 1 to 1.5 inches apart. Next, draw an opposing set of diagonal lines across the first set to form a diamond lattice pattern. This structural grid acts as the framework that catches subsequent layers of wax.
Step 3: Build the Foundation Micro-Bumps
Using the flat or beveled edge of your basecoat bar, move across the diamond grid using small, gentle circular motions (about 2 inches in diameter). Do not push down hard; let the weight of your hand do the work. As the wax crosses the raised intersections of the diamond grid, small specks will adhere and form distinct micro-bumps. Continue until the target standing and paddling zones are completely covered in raised beads.
Step 4: Layer the Temperature-Specific Topcoat
Unwrap your topcoat wax (selected via the temperature chart above). Hold the bar flat and apply it with ultra-light pressure in broad figure-eight or circular sweeping motions over the basecoat beads. You will immediately see the topcoat cling to the peaks of the base bumps, creating soft, tacky crowns. If you press too hard, you will crush the base bumps and create a flat, smeared deck.
How Much Wax Should You Use?
Wax quantity depends on the length and volume of your board. Check your board's dimensions using our Volume Calculator to assess your overall deck surface area:
- Shortboards (5'4" – 6'6"): Roughly 1/2 to 3/4 bar of basecoat; 1/3 bar of topcoat.
- Mid-Lengths / Eggs (6'8" – 8'2"): Roughly 1 full bar of basecoat; 1/2 bar of topcoat.
- Longboards (9'0"+): 1.5 to 2 bars of basecoat; 3/4 to 1 full bar of topcoat.
Pro Tip: If your basecoat wax feels like it is sliding across the glass without catching, rub a few quick, perpendicular hatch lines using the corner of the bar. Once the initial wax lines bond to the resin, the rest of the bar adheres seamlessly.
Board-Specific Waxing Zones: From Shortboard to Longboard
Different surfboard shapes serve distinct riding styles, meaning foot placement and body contact points change significantly. Consult our Board Types Guide to identify your shape's distinct riding dynamics.
SHORTBOARD (WITH PAD)         MID-LENGTH / FISH               LONGBOARD (NOSE-RIDER)
       [   ]                        [   ]                        [ * * ] (Nose)
       [   ]                        [ * ]                        [ * * ]
     [ * * * ] (Stance)           [ * * * ]                    [ * * * ]
     [ * * * ]                    [ * * * ]                    [ * * * ]
     [ [PAD] ]                    [ * * * ]                    [ * * * ]
                                  [ * * * ]                    [ * * * ]
1. Shortboards with Traction Pads
Modern performance shortboards almost universally feature an EVA foam traction pad on the tail directly over the Fin Systems. Because your back foot is locked against the tail kick, you do not need wax behind the front edge of the traction pad.
- Where to wax: Start 1 inch in front of the traction pad and wax forward roughly two-thirds of the board's length—past where your chest rests when paddling.
- Rail-to-rail coverage: Wax edge-to-edge across the center of your stance, leaving 1.5 inches of clean fiberglass along the rails near the nose to prevent wax transferring to your board bag.
2. Mid-Lengths and Fish Shapes
Mid-lengths, retro eggs, and twin-fin fishes demand a fluid stance. You will shift your feet forward while trimming high on the wave face and slide back toward the tail to initiate cutbacks.
- Where to wax: Wax continuously from 2 inches off the tail block up to roughly 12 to 18 inches back from the nose tip.
- Hand grip zones: Add wax directly along the deck rails where your hands grip during duck dives and pop-ups.
3. Longboards and Log Nose-Riders
Traditional longboarding involves cross-stepping from the tail up to the tip of the nose to hang ten.
- Where to wax: The entire deck must be waxed from the tail block to the very tip of the nose. Keep the bump density even throughout. Missing wax on the front 12 inches will cause your toes to slide straight off the nose during tip rides.
4. Soft-Top Surfboards
Soft foam decks (EVA/IXPE skins) naturally offer slightly more grip than fiberglass, but they get slick when wet.
- Application technique: Do not use basecoat on a soft-top; the deck foam is already pliable. Apply a soft Cool or Cold topcoat wax directly to the foam deck in crisscross strokes. Foam decks absorb wax differently, so expect to apply wax more frequently.
Surf Wax Troubleshooting: Common Mistakes and Fixes
Even experienced surfers run into adhesion breakdowns and melted messes. Use this surf wax troubleshooting guide to identify and fix common deck problems instantly.
1. The Wax Melts or Smears Into a Slick Paste
- The Cause: Leaving your surfboard inside a hot car, resting it deck-up on hot sand, or using a topcoat rated for water that is much colder than your local break.
- The Fix: Move the board to the shade immediately. If the bump structure has collapsed into flat grease, you cannot revive it with a wax comb. Scrape off the melted patch, let the deck cool completely, apply a light patch of basecoat, and re-layer your topcoat.
2. The Basecoat Refuses to Stick to the Fiberglass
- The Cause: Residual oils from finger prints, sunscreen, manufacturing mold-release agents on new boards, or silicone remnants from citrus cleaners.
- The Fix: Strip the area clean. Wash the bare fiberglass with warm water and standard dish soap to cut grease. Dry thoroughly, wipe down with isopropyl alcohol, and reapply your basecoat with firm, diagonal pressure.
3. Wax Strips Off in Large Flakes
- The Cause: Applying wax to a damp or cold deck, or applying a hard topcoat over an excessively soft basecoat (reversing the layering order).
- The Fix: The bond between the basecoat and the resin deck has failed. You must perform a complete de-wax using our stripping instructions and restart on a bone-dry, room-temperature board.
4. The Deck Feels Slick Despite Having Bumps
- The Cause: The topcoat has worn away, leaving only the hard, non-tacky basecoat beads exposed, or ocean algae/sunscreen has coated the bumps.
- The Fix: Use the serrated side of a wax comb to score diagonal hash marks across the existing bumps. This cuts away the contaminated outer film and exposes fresh surface area. Then, apply a thin layer of sticky topcoat.
Pro Tip: Never use your wax comb's serrated teeth to violently gouge your deck. Light diagonal scoring creates thousands of micro-edges that restore traction without shearing off the bump foundation.
Surfboard Wax Maintenance Schedules
Understanding how to wax a surfboard properly also means knowing how to maintain that wax over months of heavy surfing. Deck traction degrades over time due to body friction, seawater salt saturation, and environmental dust.
DAILY SESSION                 WEEKLY CHECK                  MONTHLY / SEASONAL
[ Light topcoat glaze ]  -->  [ Comb diagonal grooves ] --> [ Full strip to clean glass ]
(15-30 seconds)               (Restore slick bumps)         (Fresh base + topcoat)
- Before Every Session: Inspect your standing zones. Rub a 15-second "freshener coat" of temperature-specific topcoat across your front foot area and rail grip spots.
- Every 3 to 5 Sessions: Take your wax comb's toothed edge and lightly score crosshatch lines through the flattened areas to rough up the surface. Add a light dusting of topcoat.
- Every 2 to 3 Months (or Seasonally): Completely strip the surfboard down to the bare fiberglass. Seasonal water temperature shifts require different wax formulas. Stripping also removes accumulated sand and body oils, shedding up to two pounds of dead weight from your board—a performance factor frequently highlighted in equipment reviews by Stab Magazine.
To learn more about your board's structural composition and maintain its durability, explore our comprehensive guide to Surfboard Anatomy.
Frequently Asked Questions
Can I wax a board without using a basecoat?
You can, but your wax job will not last. Without an extra-hard basecoat foundation, soft topcoat wax quickly smears into flat, slick patches under your feet. Applying a basecoat ensures your traction bumps remain raised and effective for dozens of sessions.
Should I wax the rails of my surfboard?
Yes, but selectively. Apply a thin layer of wax along the rail deck edges where your hands grip the board during pop-ups and duck dives. Avoid waxing the bottom surface or the undersides of the rails, as this creates hydrodynamic drag that slows your speed down the wave line.
Does surf wax expire or go bad in the box?
Unused surf wax does not expire if stored properly. However, if kept in a hot garage, car trunk, or direct sunlight, the lighter tackifying oils will evaporate or separate from the paraffin base. Store your spare wax bars in an airtight container in a cool, dark drawer.
How do I know when it is time to fully strip and rewax my board?
You should completely strip your board when the wax turns dark gray or brown from sand and dirt, when the bumps flatten out into slick plateaus that combing no longer fixes, or when transitioning between seasons with significant water temperature changes (such as going from winter boots to summer trunks).
Can I use candle wax or paraffin canning wax as a basecoat?
While standard paraffin candle wax is chemically similar to basecoat, it lacks the specialized microcrystalline additives that bond to surfboard resins. It tends to flake off in brittle chunks under foot pressure. Stick to purpose-built surfboard basecoat wax for dependable adhesion.
Find Your Perfect Setup
Proper deck traction is only one part of dialing in your surfing equipment. To discover the ideal board dimensions, rocker profiles, and fin configurations for your weight and home break, explore our interactive tools:
- Match your skill level and wave conditions using our Board Finder Quiz.
- Fine-tune your volume and float with the Volume Calculator.
- Have questions about gear setups or fixing dinged rails? Consult our the board finder for immediate, customized recommendations.
- Explore the fascinating evolution of deck traction and surfing culture in our overview of Surfing History.